Greetings and welcome to our Blanco Laravel Theme. I'm CreaboxThemes and I'd like to thank you for purchasing one of my products, your support is much appreciated.

Please drop me a line and let me know what you think about this theme, if you have any suggestions for improvements or extra features, or if there's something you don't like.

I count on your help to constantly improve the quality of my products and bring more value to you, and all my other customers

License

With Codecanyon regular license you are licensed to use this theme to create one single End Product (the final website customized with your content) for yourself or for one client.

What is allowed with the single regular license:

  1. You can create 1 website (on a single domain) for yourself or for your client. You can then transfer that website to your client for any fee. In that case, the license is also transferred to your client.
  2. You can install the theme on your test server for testing/development purposes (this installation should not be available to the public).
  3. You can modify or manipulate the theme, you can combine it with other works to create the End Product.
  4. The theme updates for the single End Product (website) are free.

What is not allowed:

  1. With a single regular license you are not allowed to create multiple websites. For multiple websites you will need multiple regular licenses.
  2. To resell the same website (Single End Product) to another clients. You will need to purchase an extended license for this.

For more information regarding license regulations and policies, see the links below:

PSD Files & Images

IMPORTANT! It's not included .PSD files into the theme package, because the size of the file downloaded would be significantly bigger. You will get all images and clip arts while you install the theme.

Package Files

After downloading the theme package, un-zip it. Inside the package you will find the following folders:

  • 01 - Theme: the zip file blanco_laravel.zip with the files that you will need to upload into your web server.
  • 02 - Documentation: the link to this url.

We can now install Blanco. Don't worry, it's simple and fun.

Server Requirements

The Laravel framework has a few system requirements. You should ensure that your web server has the following minimum PHP version and extensions:

  • PHP >= 8.0.0
  • BCMath PHP Extension
  • Ctype PHP Extension
  • Fileinfo PHP Extension
  • JSON PHP Extension
  • Mbstring PHP Extension
  • OpenSSL PHP Extension
  • PDO PHP Extension
  • Tokenizer PHP Extension
  • XML PHP Extension

Database (creation)

Step 1

  1. Firstly you must buy a domain name. This will be the name of your site. For example http://domain.com
  2. Then you should buy a Shared hosting or VPS hosting. This is completely your choice. Shared hosting is the one we recommend to save money for this project.
  3. Note: When buying your hosting, please do not forget to mark the Linux Operating System.

Step 2

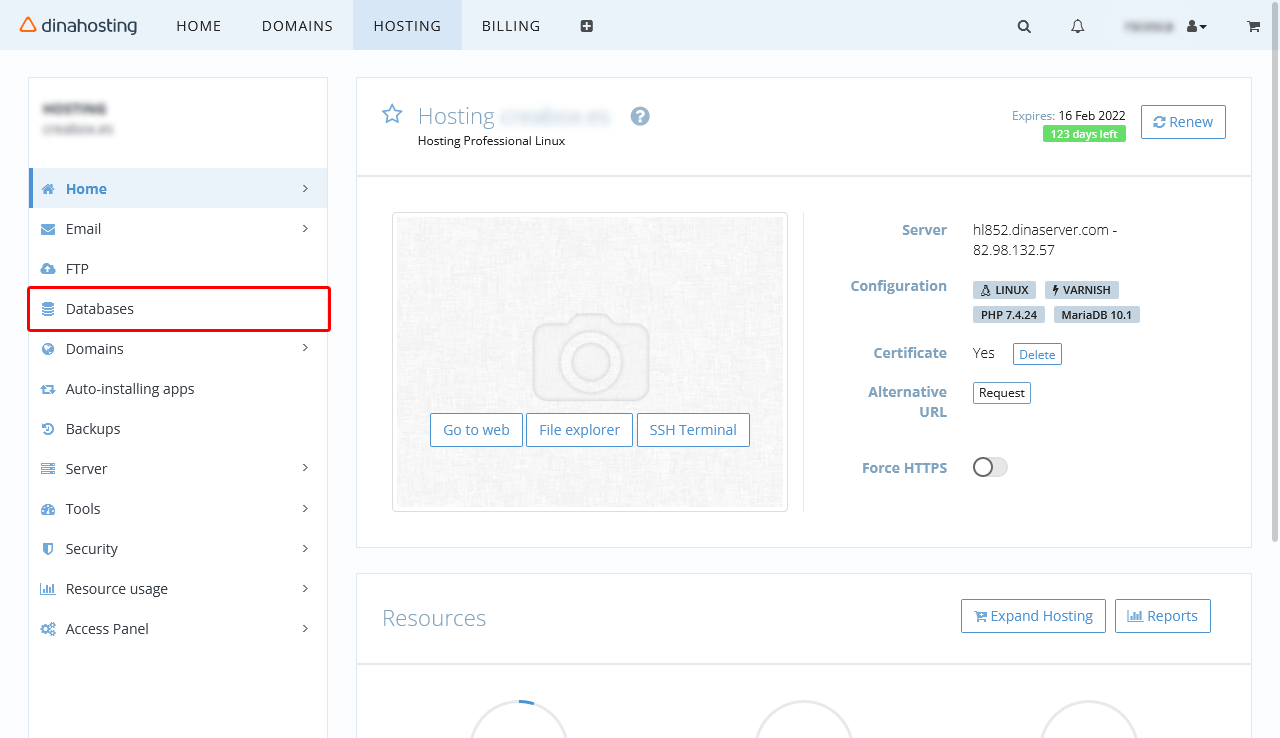
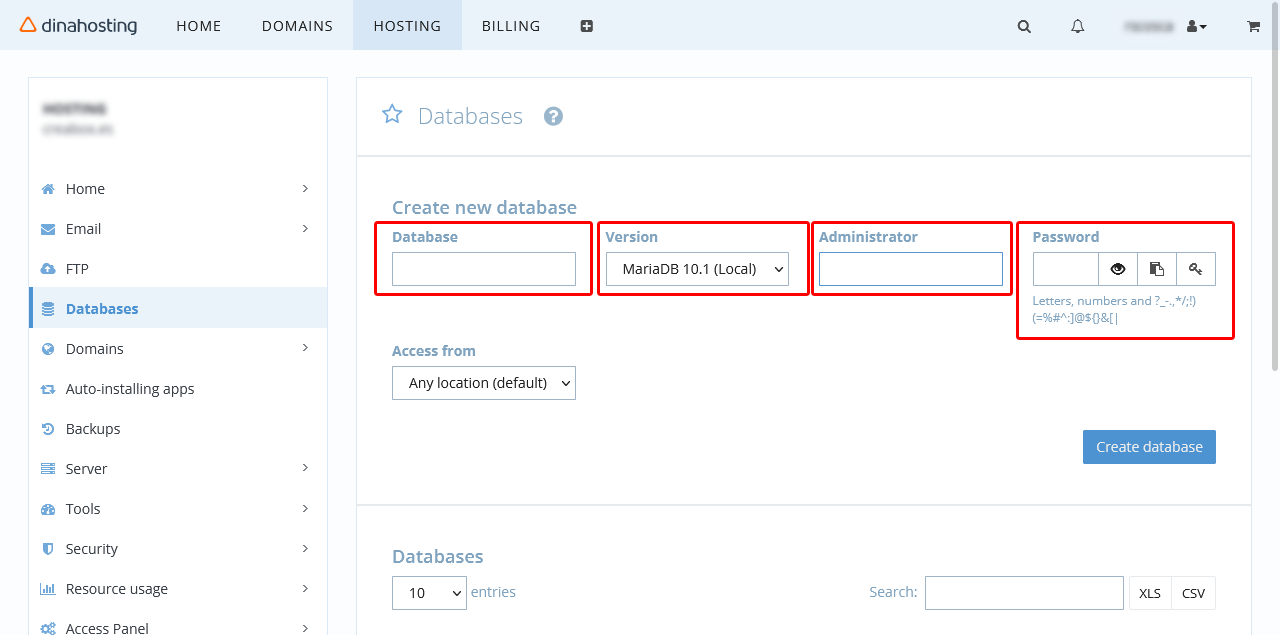
IMPORTANT! In the following tutorial the images and options may change depending on the hosting of each one. Even so, the concept is the same.

  1. There is a hosting panel on the server you bought. Login to that and follow the next steps.
  2. Go to Databases page to create a new one.
  3. Create a new database. For that, set the database name, the user and password. There are some different versions for the database. In my case I use MariaDB but it's possible select others like MySQL, PostgreSQL or MongoDB. To create it, type a name for the database, an user and a password.
  4. Once the database has been created you can check it in the list of databases.

Email configuration

IMPORTANT! If you are going to use a gmail account, you have to create an app password to use it in the MAIL_PASSWORD option.

Before uploading the files, if you want to use the contact form, you have to edit the file .env and set up the next options. In this case, this is a gmail configuration.

  • MAIL_MAILER=smtp Mail Driver. Laravel supports both SMTP and PHP's "mail" function as drivers for the sending of e-mail. You may specify which one you're using throughout your application here. By default, Laravel is setup for SMTP mail. Supported: "smtp", "sendmail", "mailgun", "mandrill", "ses", "sparkpost", "log", "array".
  • MAIL_HOST=smtp.gmail.com SMTP Host Address. ere you may provide the host address of the SMTP server used by your applications. A default option is provided that is compatible with the Mailgun mail service which will provide reliable deliveries.
  • MAIL_PORT=587 SMTP Host Port. This is the SMTP port used by your application to deliver e-mails to users of the application. Like the host we have set this value to stay compatible with the Mailgun e-mail application by default.
  • MAIL_USERNAME=email@gmail.com SMTP Server Username. If your SMTP server requires a username for authentication, you should set it here. This will get used to authenticate with your server on connection.
  • MAIL_PASSWORD=xxxxxxxxx SMTP Server Password. If your SMTP server requires a password for authentication, you should set it here. This will get used to authenticate with your server on connection.
  • MAIL_ENCRYPTION=tls E-Mail Encryption Protocol. Here you may specify the encryption protocol that should be used when the application send e-mail messages. A sensible default using the transport layer security protocol should provide great security.

The next options are used to configure the global "From" address. You may wish for all e-mails sent by your application to be sent from the same address. Here, you may specify a name, address and subject that is used globally for all e-mails that are sent by your application.

  • MAIL_FROM_ADDRESS=email@gmail.com
  • MAIL_FROM_NAME="Name application"
  • MAIL_SUBJECT="Subject for the email"

Files Upload

To upload the files my recommendation is to use a FTP client like Filezilla. Once it's installed follow the next steps:

  1. Configure the access to your FTP and open it.
  2. Click on the public_html folder and go to the folder you want to upload the theme.
  3. Click upload and select the file blanco.zip which it's inside the folder 01 - Theme.
  4. Once the file is uploaded, select it and extract all the files.
  5. When the process is finished, you can delete the blanco.zip file.
  6. Don't worry if you can't see all the files. If you can't see files like .env, click the Settings of the FTP client and select the option "Show hidden files".
  7. Then, select all the files and move them to the main folder public_html. When the operation is finished, as the folder blanco is empty, remove it.
  8. To finish the configuration, edit the .htaccess file. Copy all the code from the next file and paste it in yours.

Installation

To install the theme, go to the main url to start (for example, http://domain.com). Watch the next video to follow the steps.

Congratulations! Your application is ready. Go to yourdomain.com/login or yourdomain.com/admin to access to your admin panel.
Username: admin@domain.com
Password: 12345678

Language

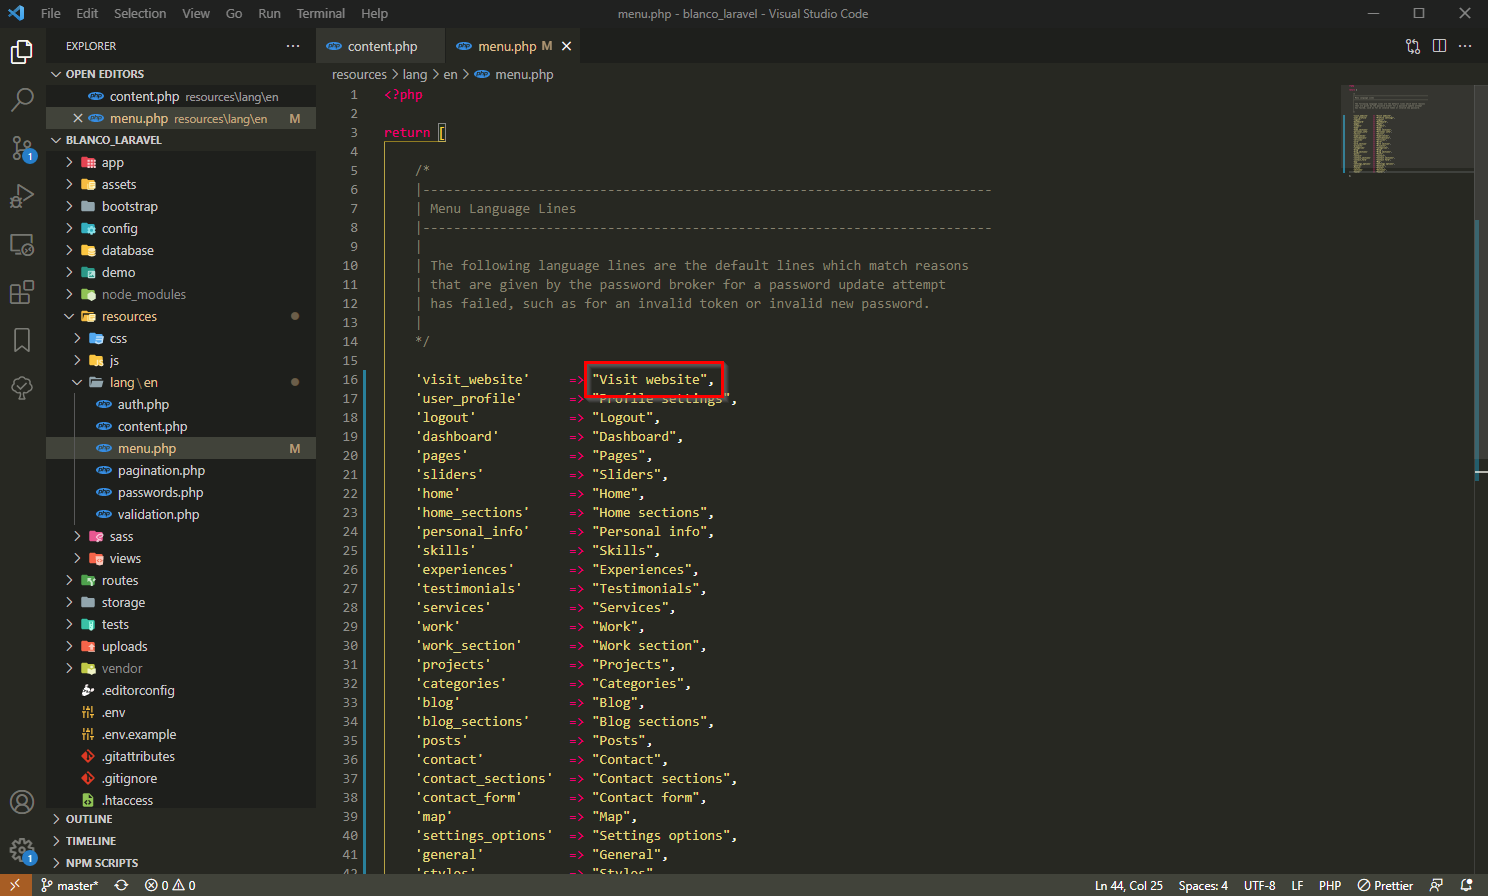
You can change the language of your admin panel. For that, edit the files content.php and menu.php that are inside the folder resources/lang/en.

In those files, edit the right value of each arrow.

When you login to the admin panel, the following screen will meet you.

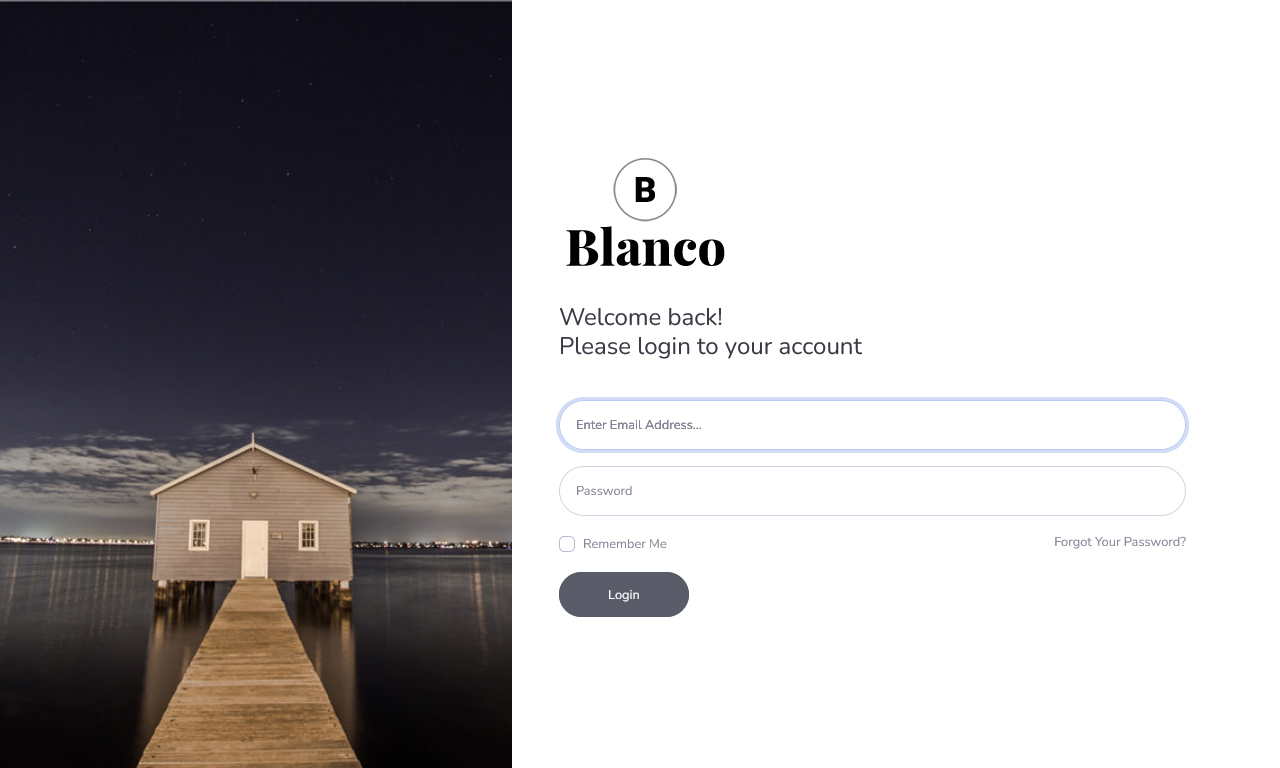
Don't worry! Blanco has an easy-to-use interface. Firstly, Dashboard will welcome you. In the left menu there are all the sections to configure your website.

  1. Sliders: the sliders for the home section. It's possible to use an image gallery or video as background.
  2. Home: the content for the about me section: personal info, skills, experiences, testimonials and services.
  3. Work: the categories and the content of your projects.
  4. Blog: the categories and the posts of your blog.
  5. Contact: the options to config the contact form and the map.
    • Map: you can get the lattitude and longitude from this website. And for the option styles 'Light Grey', 'Dark Grey' and 'Vintage' you need to get the Stadia Maps Api Key from this website.
    • Contact form: ask to your mail provider all the the smtp configuration.
  6. General: the configuration for your website. The title, description, keywords, favicon and header images, social links and loader options.
  7. Styles: the typography and colors of light and dark schemes.
  8. Sections: the sections of your website. Where you can enable or disable them. Its image backgrounds, colors and texts.
  9. Footer: the columns and its content, the copyright text and the button top.

Once again, thank you so much for purchasing this theme. As I said at the beginning, I'd be glad to help you if you have any questions relating to this theme. Please contact me via my author contact form. I'll do my best to assist you!

IMPORTANT! Please, if you like the theme I'll be very grateful if you could rate it.